 |
 |
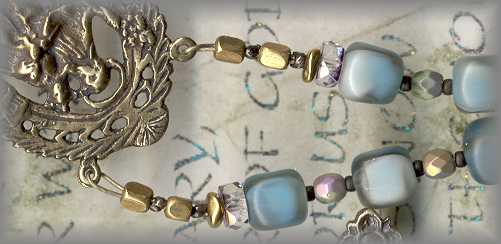
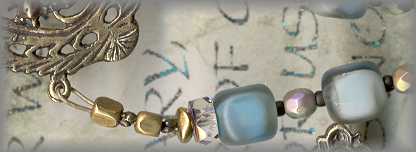
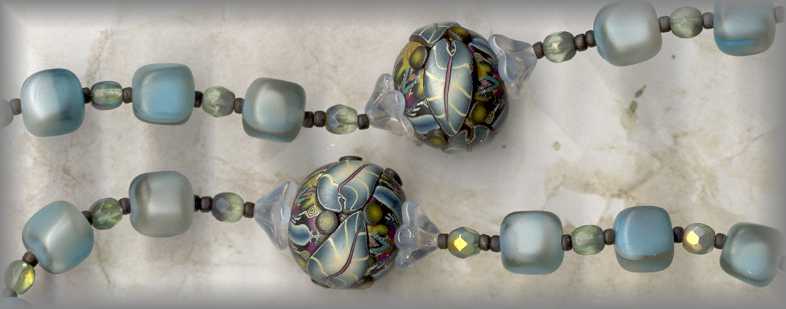
CLOSEUP OF CONNECTORS AND SPACERS
|
|
|
Most important is to make and distribute them for prayer or to pray on them ourselves! It is as simple as that.The instructions below are for the standard 5 decade rosary and may be configured as needed for your choice of devotional chaplets or other prayer needs.
![]()
~ CONFIGURATION ~
![]()
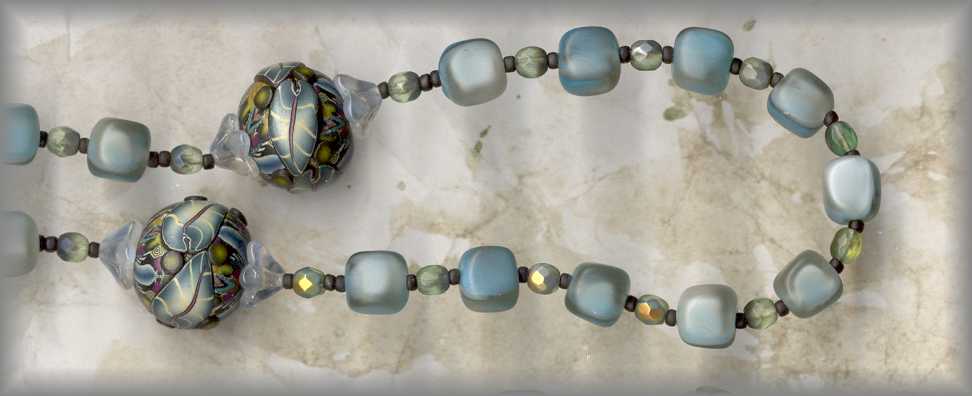
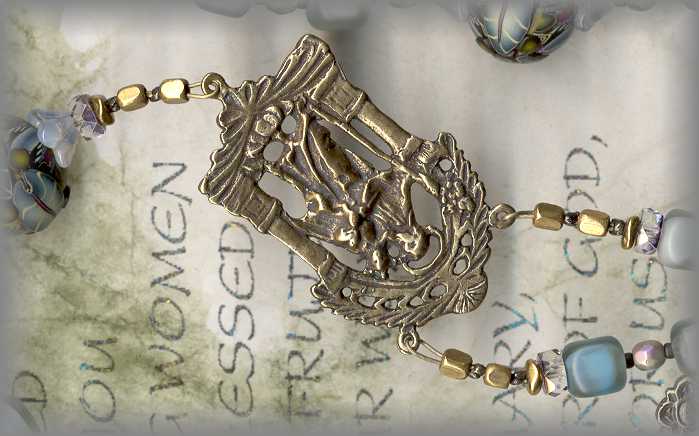
5 DECADE ROSARY
with
PENDANT
Standard 'Dominican
Rosary' instructions may be adjusted as needed for 'Anglican Rosaries'
or '10 bead Chaplets.' Dominican Rosary: 5 sets of 10 beads divided
by 4 larger beads in circle. Attached at each end by using 2 top rings
of rosary center. Pendant includes 3 Ave beads and 2 Pater beads (See below)
 |
5 BEAD PENDANT CONFIGURATION
Not: 2 large Pater beads, one at each
end of 3 smaller Ave beads attached to lower ring of rosary center and
ending in a crucifix All 4 connecting areas where wire is attached to either
the center or cross are the same and design is created through repetition
by using functional 'connecting' beads. (Large holed beads for wire to
pass through twice.)
 |
![]()
~ SUPPLIES ~
![]()
INSTRUCTIONS - STRINGING THE BEADS
BEFORE BEGINNING, PLEASE READ ALL INSTRUCTIONS
To save on wire do not cut the needed length of
wire from spool. Simply begin stringing beads onto the wire while it is
still attached to the spool. This also holds the beads on the wire while
you are working.
BEADING SUPPLIES
53 < AVE'S > - 8 mm beads
-&- 6 < PATERS > 10
- 12 mm beads -&- SEED BEADS - Tube
for spacers
VARIETY OF 4 to 5 mm beads for connecting and ornamental
use (holes on 4 to 5 mm beads must be large enough for wire to go through
twice. If the second wire is forced it may cause the wire to curl
- BEAD CAPS - optional for Paters and/or Aves - (2 for each bead.)
|
|
|
TOOLS
.019 SOFTFLEX WIRE
(30 foot spool of bronze or sterling - 49 strand
wire) -&- 2mm CRIMPING BEADS (black
ox, silver or gold colored)
|
|
|
~ A
~
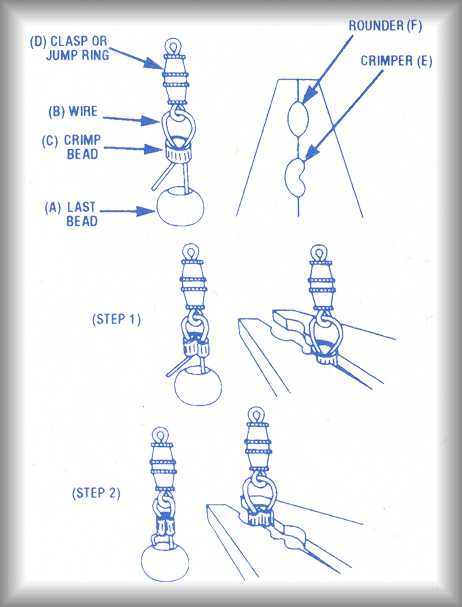
HOW TO CRIMP
Instructions below are from the back of the Crimping
Pliers. Technique will remain the same, adapt to your needs. (We normally
use two beads at each end for extra strenght)
 |
CONSTRUCTION NOTE
We would encourage you to practice crimping beads
before you start. To practice, cut a 6 in length of wire and double
it, thread on several crimps and begin the crimping process. (see
how to crimp above) It will be important to practice on 2 wires, not 1!
For strength, you will want to use 2 crimping beads at each juncture before adding center or cross. Begin by adding starter beads as in image left to right:
 |
TO END: draw wire through 1 crimp - 1 bead - 1 crimp - 1 bead. Loop wire through ring on center or crucifix then return through the same beads: 1 bead - 1 crimp - 1 bead - 1 crimp - 1 bead. Adjust length of loop as needed and crimp. (Make sure all loops are the same size.)
~ B
~
DECADE of 10 AVE BEADS
Now that you are ready to begin your first decade,
you will need to put spacers between each AVE bead of decade. Try 2 or
3 seed beads between each 8mm AVE bead to see which works best for your
praying fingers. (Go back and look at first image, noting you will begin
your design by counting from the top ring of the center medal.) Continue
this sequence until you have completed your first decade of 10, ending
with an AVE bead. Now you will be adding your first PATER bead.
|
|
|
|
~ C
~
ADDING PATER BEAD
You will need to create a larger space between
last AVE bead and PATER bead by adding more seeds and other decorative
beads of your choice. (eg: same beads used next to crimpers may work well
- metal caps, etc) Once completed you are ready to start your next decade
of 10 AVES.
 |
|
|
~ D ~
REPEAT SEQUENCE
Repeat sequence
until you have completed 5 decades separated by 4 PATER beads ( you will
end with an AVE bead, not a PATER bead)
+
DESIGN NOTE
At the end of the 5th Decade, repeat A adding two
more crimping beads.
|
|
|
|
~ E
~
TO ADD CENTER
1. Using one of the two top rings of the rosary
center, (allowing the lower ring for the pendant) thread about 2 1/2
inches of wire through ring and back through 2 crimps and first 2 beads.
2. Adjust so wire loop is 5 mm or less. Make sure all loops are all
the same size.
 |
~ F
~
TO FORM CRIMPING BEAD
technique will remain the same, adapt to your needs.
+
CONSTRUCTION NOTE
Make sure wire that is looped through the center,
'ender' beads and crimping beads is positioned parallel to itself.
If it cross over itself it may cause the rosary to twist at the last minute
- then begin crimping:
+
To form a tight, clean and well shaped crimped
bead you will need crimping pliers. Check images above noting difference
in shape of the two areas for crimping. (For proper crimping - make sure
you hold the pliers so curve points towards you and not away)
+
1. Set crimp into inside 'crimper'
- crimp bead into a 'c' shape to tighten and secure both wires.
2. Set crimp in outside 'folder or rounder'
- to fold and flatten bead back onto itself.
3. In same hole, turn bead 1/4 turn -
crimp
lightly but firmly again to round bead off.
(never work your pliars too hard as the crimp may
cut through the wire causing it to break later) It becomes the weakest
spot on the rosary if not careful.
|
|
~ G
~
TO COMPLETE LOOP
+
CONSTRUCTION NOTE
Hold rosary
so center hangs down and spool is on top to release and let beads 'settle'
on wire. Make sure beads are not caught on wire creating empty
spaces by running fingers down the beads several times. This also helps
release any twisting of the wire. Cut wire off of spool about 3 inches
beyond beads. Repeat E using other top ring and
making sure your wire connecting loops are all the same size before crimping.
~ H
~
TO COMPLETE PENDANT WITH CRUCIFIX,
USE TECHNIQUES and IMAGES ABOVE.
+
DESIGN NOTE
note that the
4 'ender' bead configurations are the same. The purpose of this is to create
the same design on each end as 3 connect to the center and 1 connects the
crucifix.
+
CONSTRUCTION NOTE
Before crimping
pendant to center , check to make sure center and crucifix are facing in
the same direction. Make sure your wire is parallel to itself as crimping
overlapping wires may cause the metals to twist at the last minute.
SAMPLE ROSARY NOT FOR SALE
Thank you for asking but we only found enough blue
antique beads to make one rosary (shown) and unable to find any more. this
rosary is in a private collection and is not for sale. Pater beads are
by Klew Expressions (Karen Lewis, California Bead Artist))
FOR MORE INFORMATION:
VISIT ROSARYWORKSHOP.COM